수 년 전에 시놀로지 NAS 의 패키지 센터에서 워드프레스를 설치해보고
뭔가 구식같은 느낌에 실망하고 지웠었던 기억이 있다.
그러다가 지금 회사에서 워드프레스를 사용 하게 되었는데,
익혀가면서 재미있는 도구라는 생각이 든다.
요즘엔 굳이 고생해서 사이트를 만들지 않아도 편리한 서비스가 많지만
워드프레스만큼 범용으로 활용할 수 있는 도구는 없는 것 같다.
그래서 이번 기회에 개인적으로도 사이트를 만들어서 학습하기 위해 워드프레스를 설치했다.
개요
WordPress 는 대표적인 PHP 기반의 웹 어플리케이션으로, 주로 LAMP 또는 LEMP 스택과 함께 사용된다.
LAMP: [L]inux, [A]pache, [M]ySQL/MariaDB, [P]HP
LEMP: [L]inux, [E]nginx(Nginx), [M]ySQL/MariaDB, [P]HP
OS, 웹 서버, 데이터베이스, 프로그래밍언어 이 4개가 계층적/의존적으로 작동하기 때문에 이 묶음을 스택이라 부른다.
이 구성은 오픈소스 웹 개발 환경의 표준이나 다름 없어서 구글에 굉장히 자료가 많고, 이 4개를 묶은 배포본도 존재하니 간단하게 초기 셋팅을 할 수 있다.
여기서는 기록을 위해 개별적으로 하나씩 설정해본다.
버전 선택
WordPress PHP 호환성 확인
https://make.wordpress.org/core/handbook/references/php-compatibility-and-wordpress-versions/
PHP Compatibility and WordPress Versions
WordPress aims to support new versions of PHP on the day they are released as much as possible. As a project, the process of supporting these new versions begins after each new PHP version has hit …
make.wordpress.org
WordPress 릴리즈 페이지
https://ko.wordpress.org/download/releases/
릴리즈 아카이브
Releases This is an archive of every release we’ve done that we have a record of.None of these are safe to use, except the latest in the series, which is actively maintained. Curious about which jazzers we highlighted for each release? It’s on the Hist
ko.wordpress.org
PHP 설치
root@ubuntu:/home/razor1911# sudo apt install php8.1
그 후 php8.1-fpm도 설치해준다.
NGINX 설치
추후 추가...
이미 쓰던 게 있어서 그대로 사용함...
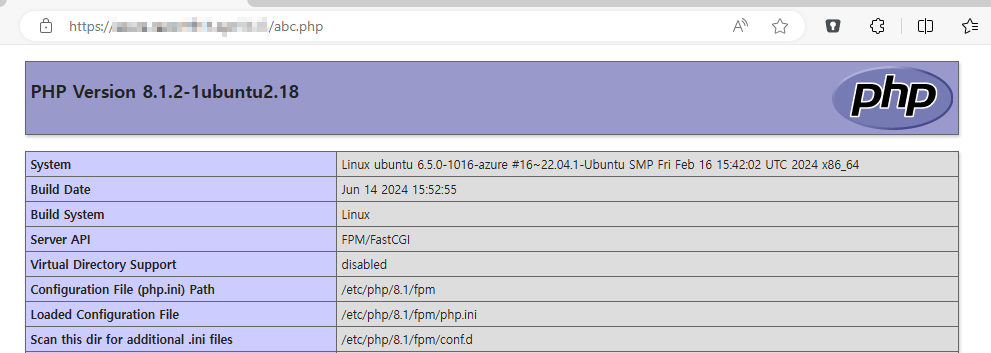
/var/www/html/ 하위에 테스트 페이지를 추가해서 php 가 동작하는지 확인한다.
<?php
phpinfo();
?>
MySQL 설치
root@ubuntu:/home/razor1911# sudo apt install mysql-server
root 계정에서 접속 시도를 해보면 패스워드 없이 그냥 로그인이 된다.
root@ubuntu:/home/razor1911# sudo mysql -u root -p
Enter password:
Welcome to the MySQL monitor.  Commands end with ; or \g.
Your MySQL connection id is 12
Server version: 8.0.39-0ubuntu0.22.04.1 (Ubuntu)

Copyright (c) 2000, 2024, Oracle and/or its affiliates.

Oracle is a registered trademark of Oracle Corporation and/or its
affiliates. Other names may be trademarks of their respective
owners.

Type 'help;' or '\h' for help. Type '\c' to clear the current input statement.

mysql>
이것은 초기 패스워드가 없는 것이 아니라 auth_socket 인증 플러그으로 인한 것이다. (주로 Ubuntu 배포버전)
확인해보면...auth_socket 방식으로 인증을 함을 알 수 있다.
mysql> SELECT user, host, plugin FROM mysql.user WHERE user = 'root';
+------+-----------+-------------+
| user | host      | plugin      |
+------+-----------+-------------+
| root | localhost | auth_socket |
+------+-----------+-------------+
1 row in set (0.00 sec)

mysql>
WordPress DB/계정 생성
참고로 MySQL 8.x 부터는 GRANT 명령과 IDENTIFIED BY 를 같이 사용할 수 없으므로 아래 명령은 사용할 수 없다.
(X) GRANT ALL ON wordpress_db.* TO 'wp_user'@'localhost' IDENTIFIED BY 'password';
DB CREATE 와 GRANT 를 각각 수행한다.
razor1911@ubuntu:~$ sudo mysql -u root -p
mysql> CREATE USER 'wp_user'@'localhost' IDENTIFIED WITH mysql_native_password BY '패스워드';
Query OK, 0 rows affected (0.02 sec)

mysql> SELECT User, Host, plugin FROM mysql.user;
+------------------+-----------+-----------------------+
| User             | Host      | plugin                |
+------------------+-----------+-----------------------+
| debian-sys-maint | localhost | caching_sha2_password |
| mysql.infoschema | localhost | caching_sha2_password |
| mysql.session    | localhost | caching_sha2_password |
| mysql.sys        | localhost | caching_sha2_password |
| root             | localhost | auth_socket           |
| wp_user          | localhost | mysql_native_password |
+------------------+-----------+-----------------------+
6 rows in set (0.00 sec)

mysql> CREATE DATABASE wp_db;
Query OK, 1 row affected (0.01 sec)

mysql> GRANT ALL PRIVILEGES ON wp_db.* TO 'wp_user'@'localhost';
Query OK, 0 rows affected (0.01 sec)

mysql> FLUSH PRIVILEGES;
Query OK, 0 rows affected (0.01 sec)
바이너리 로깅 비활성화 (테스트 서버인 경우만)
테스트 환경에서는 디스크 용량을 낭비할 수 없어서 바이너리 로깅을 끌 수 있다.
바이너리 로깅 상태 체크
mysql> SHOW BINARY LOGS;
+---------------+-----------+-----------+
| Log_name      | File_size | Encrypted |
+---------------+-----------+-----------+
| binlog.000001 |       180 | No        |
| binlog.000002 |       404 | No        |
| binlog.000003 |       967 | No        |
+---------------+-----------+-----------+
3 rows in set (0.00 sec)

mysql>
my.cnf 파일을 열고..
razor1911@ubuntu:~$ sudo nano /etc/mysql/my.cnf
아래 라인을 추가한다.
[mysqld]
disable_log_bin
서비스 재시작 후, 다시 바이너리 로깅 상태를 체크하면 로깅이 꺼졌음을 알 수 있다.
razor1911@ubuntu:~$ sudo systemctl restart mysql

mysql> SHOW BINARY LOGS;
ERROR 1381 (HY000): You are not using binary logging
mysql>
WordPress 설치
root@ubuntu:/var/www/html# wget https://wordpress.org/wordpress-6.6.1.tar.gz
root@ubuntu:/var/www/html# tar -xvf wordpress-6.6.1.tar.gz
root@ubuntu:/var/www/html# cp -R /home/razor1911/wordpress/* /var/www/html/
여기까지 하고 초기 화면이 표시되는지 확인해본다.
만약 표시가 안될 경우, NGINX 에서 워드프레스 홈 경로가 제대로 설정되어있는지 확인한다.

DB 정보를 입력 후, Submit 을 누른다.

DB 연결에 성공하면 아래와 같은 화면이 표시된다.

그 후, 관리자 계정, 패스워드 설정을 하고나면 관리자 화면에 진입하게 된다.


