OS 버전 확인
razor1911@ubuntu:~$ cat /etc/lsb-release
DISTRIB_ID=Ubuntu
DISTRIB_RELEASE=22.04
DISTRIB_CODENAME=jammy
DISTRIB_DESCRIPTION="Ubuntu 22.04.3 LTS"
패키지 버전 확인
sudo apt-cache showpkg helix-swarm

결과
Provides:
2025.1-2745343~jammy -
2024.6-2710109~jammy -
2024.5-2699909~jammy -
2024.4-2699934~jammy -
2024.3-2699919~jammy -
2024.2-2700313~jammy -
2024.1-2700314~jammy -
2023.4-2546515~jammy -
2023.3-2547393~jammy -
2023.2-2550032~jammy -
Reverse Provides:
패키지 설치
razor1911@ubuntu:~$ sudo apt-get install helix-swarm=2025.1-2745343~jammy
Reading package lists... Done
Building dependency tree... Done
Reading state information... Done
The following additional packages will be installed:
  apache2 apache2-data jq libcommon-sense-perl libio-socket-ssl-perl libjq1 libjson-perl libjson-xs-perl libnet-ssleay-perl libossp-uuid16 libtypes-serialiser-perl liburi-perl
  perl-openssl-defaults php-redis php8.1-igbinary php8.1-redis ssl-cert uuid
Suggested packages:
  apache2-doc apache2-suexec-pristine | apache2-suexec-custom www-browser helix-swarm-optional helix-swarm-triggers libbusiness-isbn-perl libwww-perl redis-server
The following NEW packages will be installed:
  apache2 apache2-data helix-swarm jq libcommon-sense-perl libio-socket-ssl-perl libjq1 libjson-perl libjson-xs-perl libnet-ssleay-perl libossp-uuid16 libtypes-serialiser-perl
  liburi-perl perl-openssl-defaults php-redis php8.1-igbinary php8.1-redis ssl-cert uuid
0 upgraded, 19 newly installed, 0 to remove and 94 not upgraded.
Need to get 90.0 MB of archives.
After this operation, 225 MB of additional disk space will be used.
Do you want to continue? [Y/n]
그런데 이미 80 포트를 다른 서비스에서 사용 중이라서 설치 중 다음과 같은 에러가 발생한다.
NOTICE: You are seeing this message because you have apache2 package installed.
Processing triggers for libapache2-mod-php8.1 (8.1.2-1ubuntu2.21) ...
Job for apache2.service failed because the control process exited with error code.
See "systemctl status apache2.service" and "journalctl -xeu apache2.service" for details.
invoke-rc.d: initscript apache2, action "restart" failed.
× apache2.service - The Apache HTTP Server
     Loaded: loaded (/lib/systemd/system/apache2.service; enabled; vendor preset: enabled)
     Active: failed (Result: exit-code) since Mon 2025-06-23 14:47:47 UTC; 11ms ago
       Docs: https://httpd.apache.org/docs/2.4/
    Process: 1264007 ExecStart=/usr/sbin/apachectl start (code=exited, status=1/FAILURE)
        CPU: 17ms

Jun 23 14:47:47 ubuntu systemd[1]: Starting The Apache HTTP Server...
Jun 23 14:47:47 ubuntu apachectl[1264010]: (98)Address already in use: AH00072: make_sock: could not bind to address [::]:80
Jun 23 14:47:47 ubuntu apachectl[1264010]: (98)Address already in use: AH00072: make_sock: could not bind to address 0.0.0.0:80
Jun 23 14:47:47 ubuntu apachectl[1264010]: no listening sockets available, shutting down
Jun 23 14:47:47 ubuntu apachectl[1264010]: AH00015: Unable to open logs
Jun 23 14:47:47 ubuntu apachectl[1264007]: Action 'start' failed.
Jun 23 14:47:47 ubuntu apachectl[1264007]: The Apache error log may have more information.
Jun 23 14:47:47 ubuntu systemd[1]: apache2.service: Control process exited, code=exited, status=1/FAILURE
Jun 23 14:47:47 ubuntu systemd[1]: apache2.service: Failed with result 'exit-code'.
Jun 23 14:47:47 ubuntu systemd[1]: Failed to start The Apache HTTP Server.
Processing triggers for php8.1-cli (8.1.2-1ubuntu2.21) ...
Errors were encountered while processing:
 helix-swarm
needrestart is being skipped since dpkg has failed
E: Sub-process /usr/bin/dpkg returned an error code (1)
razor1911@ubuntu:~$
apache2 사용 포트를 바꿔준다.
/etc/apache2/ports.conf
# If you just change the port or add more ports here, you will likely also
# have to change the VirtualHost statement in
# /etc/apache2/sites-enabled/000-default.conf

Listen 8080

<IfModule ssl_module>
        Listen 8443
</IfModule>

<IfModule mod_gnutls.c>
        Listen 8443
</IfModule>

# vim: syntax=apache ts=4 sw=4 sts=4 sr noet
VirtualHost 도 8080 으로 바꿔준다.
/etc/apache2/sites-available/000-default.conf
<VirtualHost *:8080>
        # The ServerName directive sets the request scheme, hostname and port that
        # the server uses to identify itself. This is used when creating
        # redirection URLs. In the context of virtual hosts, the ServerName
        # specifies what hostname must appear in the request's Host: header to
        # match this virtual host. For the default virtual host (this file) this
        # value is not decisive as it is used as a last resort host regardless.
        # However, you must set it for any further virtual host explicitly.
        #ServerName www.example.com

        ServerAdmin webmaster@localhost
        DocumentRoot /var/www/html

        # Available loglevels: trace8, ..., trace1, debug, info, notice, warn,
        # error, crit, alert, emerg.
        # It is also possible to configure the loglevel for particular
        # modules, e.g.
        #LogLevel info ssl:warn

        ErrorLog ${APACHE_LOG_DIR}/error.log
        CustomLog ${APACHE_LOG_DIR}/access.log combined

        # For most configuration files from conf-available/, which are
        # enabled or disabled at a global level, it is possible to
        # include a line for only one particular virtual host. For example the
        # following line enables the CGI configuration for this host only
        # after it has been globally disabled with "a2disconf".
        #Include conf-available/serve-cgi-bin.conf
</VirtualHost>

# vim: syntax=apache ts=4 sw=4 sts=4 sr noet
apache 서비스가 정상화 되었는지 확인해본다.
razor1911@ubuntu:~$ sudo systemctl restart apache2
razor1911@ubuntu:~$ sudo systemctl status apache2
● apache2.service - The Apache HTTP Server
     Loaded: loaded (/lib/systemd/system/apache2.service; enabled; vendor preset: enabled)
     Active: active (running) since Mon 2025-06-23 14:52:50 UTC; 2s ago
       Docs: https://httpd.apache.org/docs/2.4/
    Process: 1264229 ExecStart=/usr/sbin/apachectl start (code=exited, status=0/SUCCESS)
   Main PID: 1264233 (apache2)
      Tasks: 55 (limit: 4687)
     Memory: 7.9M
        CPU: 41ms
     CGroup: /system.slice/apache2.service
             ├─1264233 /usr/sbin/apache2 -k start
             ├─1264234 /usr/sbin/apache2 -k start
             └─1264235 /usr/sbin/apache2 -k start

Jun 23 14:52:50 ubuntu systemd[1]: Starting The Apache HTTP Server...
Jun 23 14:52:50 ubuntu systemd[1]: Started The Apache HTTP Server.
razor1911@ubuntu:~$
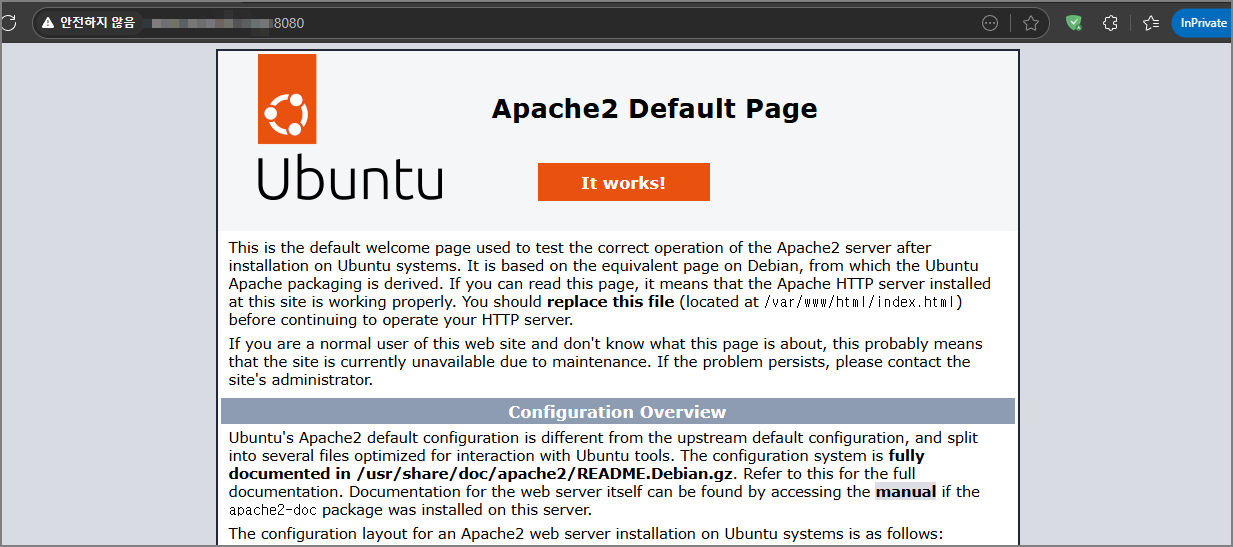
8080 포트로 접속도 해보자.

Swarm 마지막 단계 마무리를 위해 다시 재설치를 시도한다.
이번엔 제대로 설치가 완료 되었다.
razor1911@ubuntu:~$ sudo apt-get install helix-swarm=2025.1-2745343~jammy
Reading package lists... Done
Building dependency tree... Done
Reading state information... Done
helix-swarm is already the newest version (2025.1-2745343~jammy).
0 upgraded, 0 newly installed, 0 to remove and 94 not upgraded.
1 not fully installed or removed.
After this operation, 0 B of additional disk space will be used.
Do you want to continue? [Y/n] y
Setting up helix-swarm (2025.1-2745343~jammy) ...
Using PHP version 8.1
helix-swarm: restarting Apache...

::::::::::::::::::::::::::::::::::::::::::::::::::::::::::::::::::::::
::
::  Swarm is now installed, but not yet configured.
::  You must run the following to configure Swarm (as root):
::
::      sudo /opt/perforce/swarm/sbin/configure-swarm.sh
::
::::::::::::::::::::::::::::::::::::::::::::::::::::::::::::::::::::::
설치 스크립트를 실행한다.
Step1: P4PORT 설정하기 여기서는 난 perforce 와 동일한 서버에 설치했으므로 localhost:1666 으로 한다.
razor1911@ubuntu:~$ sudo /opt/perforce/swarm/sbin/configure-swarm.sh
------------------------------------------------------------
configure-swarm.sh: Mon Jun 23 15:15:03 UTC 2025: commencing configuration of Swarm

Summary of arguments passed:
Interactive?       [yes]
Force?             [no]
P4PORT             [(not specified)]
Swarm user         [(not specified, will suggest swarm)]
Swarm password     [(not specified)]
Email host         [(not specified)]
Create depot       [(not specified)]
Bypass Lock        [(not specified)]
Use Extensions?    [(not specified)]
Swarm host         [(not specified, will suggest ubuntu....cloudapp.net)]
Swarm port         [(default (80))]
Swarm base URL     [(default (empty))]
Create Swarm user? [(not specified)]
Super user         [(not specified)] * not needed
Super password     [(not specified)] * not needed

No P4PORT specified

Swarm requires a connection to a Helix Core Server
Please supply the P4PORT to connect to.

Helix Core Server address (P4PORT) localhost:1666
-response: [localhost:1666]

Checking P4PORT [localhost:1666]...
Checking to see if Helix Core Server is running in Unicode mode...
-Unicode Helix Core Server detected; setting charset to [utf8]...
-P4 command line to use: [/opt/perforce/bin/p4 -p localhost:1666 -C utf8]
Attempting connection to [localhost:1666]...
-connection successful:
  Server address: localhost:1666
  Server license: none
  Server version: P4D/LINUX26X86_64/2024.1/2661979 (2024/10/04)
  ServerID: master
Checking Swarm user credentials...
No Swarm user specified
Step2: swarm 서비스 전용으로 사용할 계정 정보를 입력한다.
미리 P4Admin 에서 만들어두면 편리하다.
참고로 swarm 연동을 위해서는 admin 권한 이상의 계정이 필요하고, 해당 유저는 로그인 티켓 만료 기간이 길어야 한다.
(사실상 무제한인 유저를 추가해야 함)
Step3: Hostname 을 입력한다.
그냥 쉽게 브라우저로 swarm 에 접근할 수 있는 URL 을 입력하면 된다.
Step4: 리뷰 관련 이메일 발송을 위해 smtp 서버 설정을 한다.
과거 버전에서는 이메일 서버 설정을 반드시 해야 했었는데, 지금은 그냥 엔터를 치면 안하고 넘어갈 수 있다.
Step5: Swarm 설정 변경을 위해 슈퍼 어드민 계정 정보를 제공해야 한다.
Step6: 리뷰 댓글에 파일을 첨부할 수 있는 기능을 활성화 할 지 결정한다.
이 기능을 사용할 경우에는 Perforce 에 //.swarm/... 이라는 depot 을 생성 후, 해당 공간에 첨부파일들을 버전 처럼 저장한다.
그리고 해당 depot 은 오직 super admin 과 swarm 계정만 접근 가능하도록 보호 설정도 반영된다.
Step7: Swarm Extenstion 사용 여부를 설정한다.
Perforce 는 Extension 사용을 추천하지만 난 아직 Trigger 에 익숙해져있어서 No 를 선택..
설정 완료..
Trigger 를 추가로 설치해서 셋팅해야 한다는 메시지도 표시된다.
::::::::::::::::::::::::::::::::::::::::::::::::::::::::::::::::::::::
::
::  Swarm is now configured and should be available at:
::
::      http://my.site.com/
::
::  Ensure that you have configured the Swarm hostname in your
::  network's DNS, or have added an IP address-to-hostname
::  mapping to your computer's hosts configuration so that you
::  can access Swarm.
::
::  You may login as the Swarm user [razor1911] using the password
::  you specified.
::
::  You need to install the Helix Swarm triggers on your Helix Core Server
::  in order for Swarm installation to be completed. The easiest way is by
::  installing the following package on the server hosting your Helix Core
::  Server:
::
::      helix-swarm-triggers
::
::  (If your Helix Core Server is hosted on an OS and
::  platform that is not compatible with the above package, you can
::  also install the trigger script manually.)
::
::  You will then need to configure the triggers, as covered in the Swarm
::  documentation:
::
::  https://www.perforce.com/perforce/doc.current/manuals/swarm/setup.perforce.html
::
::  Documentation for optional post-install configuration, such as
::  configuring Swarm to use HTTPS, operate in a sub-folder, or on a
::  custom port, is available:
::
::  https://www.perforce.com/perforce/doc.current/manuals/swarm/setup.post.html
::
::::::::::::::::::::::::::::::::::::::::::::::::::::::::::::::::::::::
Swarm Trigger 도 설치해준다.
sudo apt-get install helix-swarm-triggers설치가 완료되면 /opt/perforce/swarm-triggers/bin/swarm-trigger.pl 가 생성된다.
/opt/perforce/etc/swarm-trigger.conf 내용을 적절히 수정해준다. (상세한 방법은 공식 가이드를 참고)
Swarm_Token 값은 swarm 을 super admin 으로 접속 후, About Swarm 페이지를 보면 확인할 수 있다.
my %config = (
    SWARM_HOST        => 'http://my-swarm-host',
    SWARM_TOKEN       => 'MY-UUID-STYLE-TOKEN',
    ADMIN_USER        => '',
    ADMIN_TICKET_FILE => '',
    P4_PORT           => '',
    P4                => 'p4',
    EXEMPT_FILE_COUNT => 0,
    EXEMPT_EXTENSIONS => '',
    COOKIES           => '',
    VERIFY_SSL        => 1,
    TIMEOUT           => 30,
    IGNORE_TIMEOUT    => 0,
    IGNORE_NOSERVER   => 0
);
트리거가 정상 동작하는지 확인해본다.
perl "/opt/perforce/swarm-triggers/bin/swarm-trigger.pl" -t ping -v 0
이제 swarm 의 worker 가 정상적으로 동작하도록 해주자.
기본 포트가 80이 아니므로 아래 파일에서 URL 을 수정해야한다.
/opt/perforce/etc/swarm-cron-hosts.conf
일단 여기까지 진행을 했지만 막상 사이트에 접속해보면 apache 기본 페이지가 표시된다.
비활성화 해준다.
razor1911@ubuntu:~$ sudo a2dissite 000-default
Site 000-default disabled.
To activate the new configuration, you need to run:
  systemctl reload apache2
razor1911@ubuntu:~$ sudo systemctl reload apache2
razor1911@ubuntu:~$
그런데 기본 포트를 사용하지 않는 환경에서는 여전히 기본 페이지가 표시될 것이다.
아래 파일에서 다시 웹 포트를 바꿔준다.
/etc/apache2/sites-available/perforce-swarm-site.conf
그 후 apache 를 다시 reload 하고 해당 포트로 접속해보자.
php 에러가 발생할 경우 아래와 같이 해결해주자.
sudo a2dismod mpm_event
sudo a2enmod mpm_prefork
sudo a2enmod php8.1
sudo systemctl restart apache2
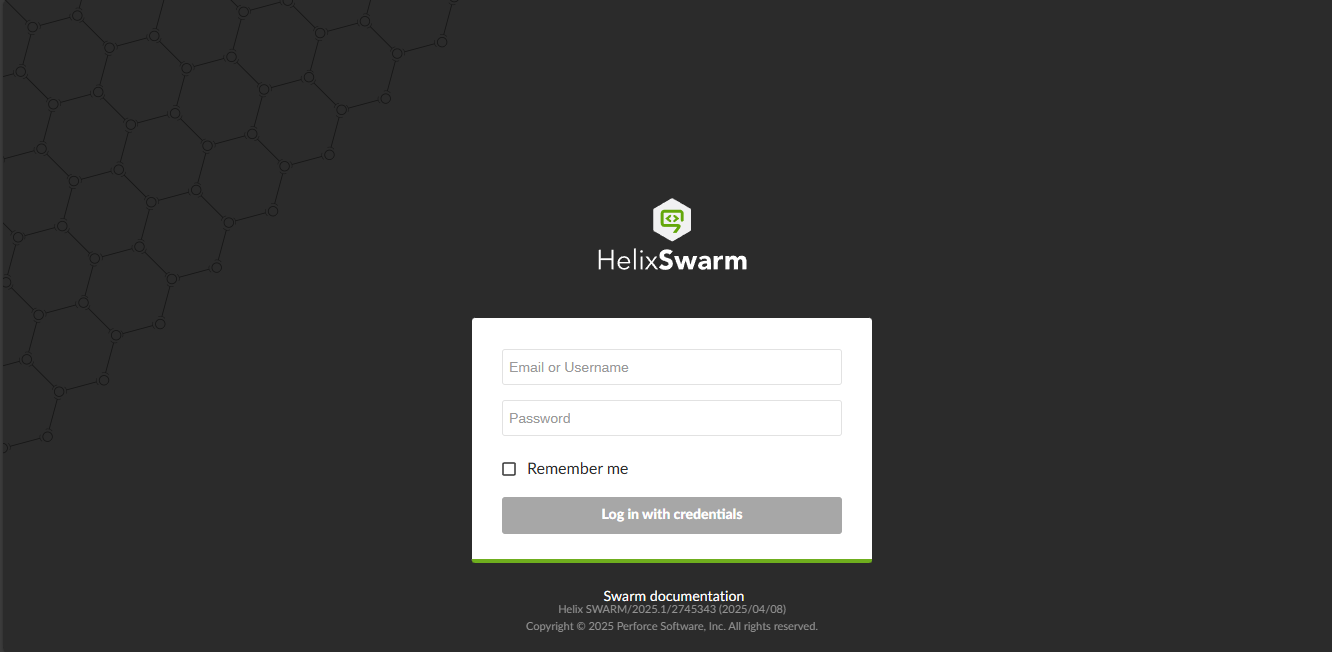
마침내 접속이 된다.


